Now that the holidays are fully upon us, and beautiful light displays are popping up everywhere, what better time to get out with your camera and create some unique images.
I love the peaceful beauty that holiday lights convey, and I personally get out to photograph them as often as I can. Photographing bright lights against dark skies or indoor areas pose some significant challenges for photography. The following are a few tips that might help you create some great images of your own.
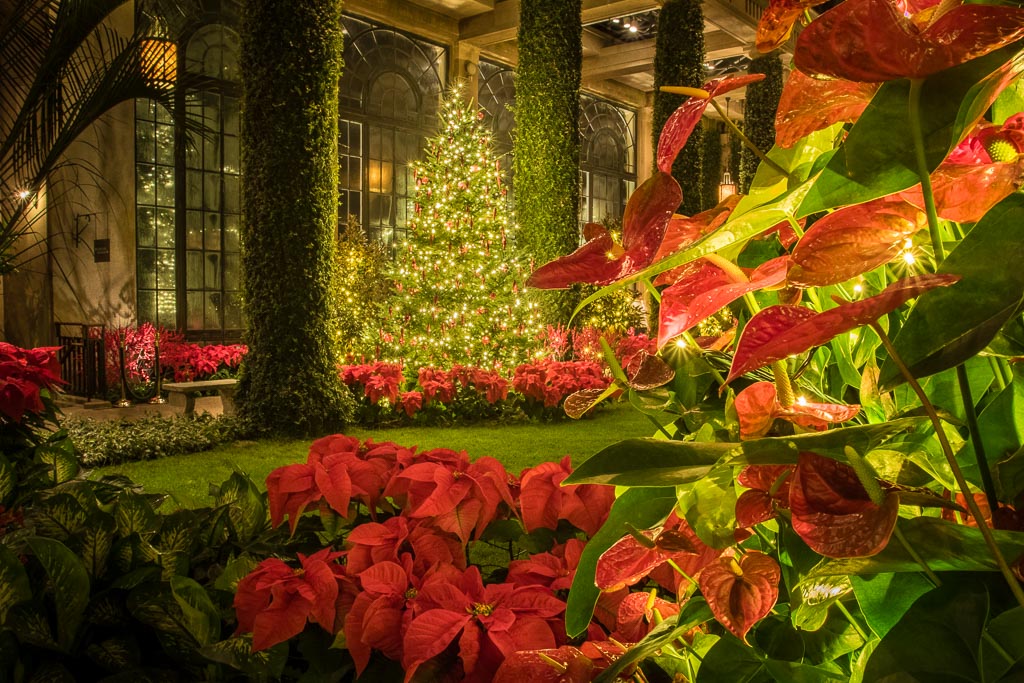
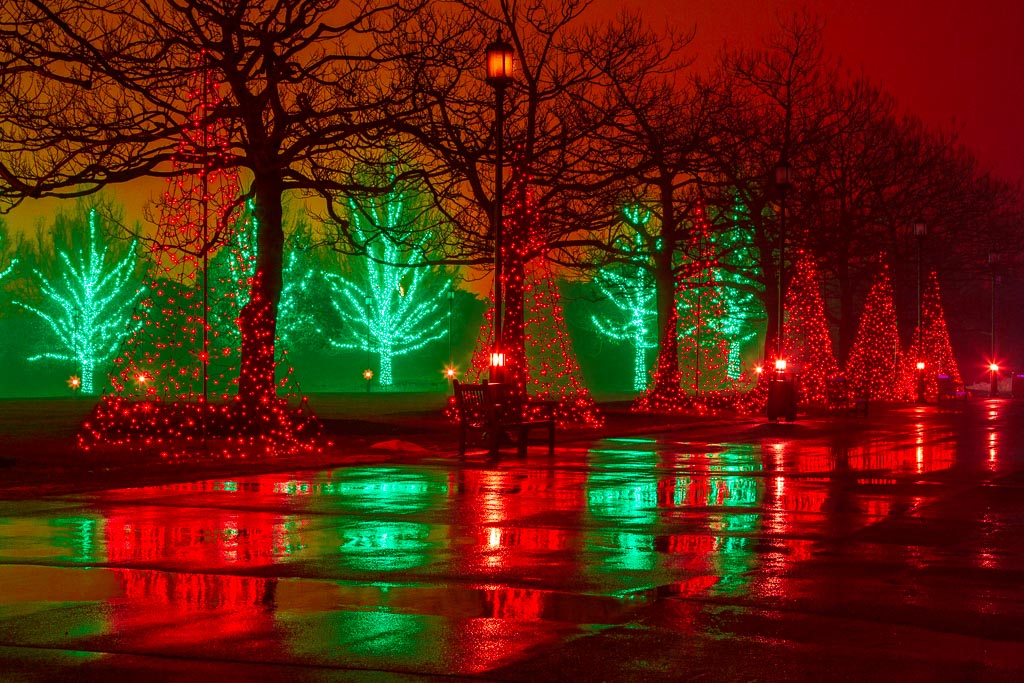
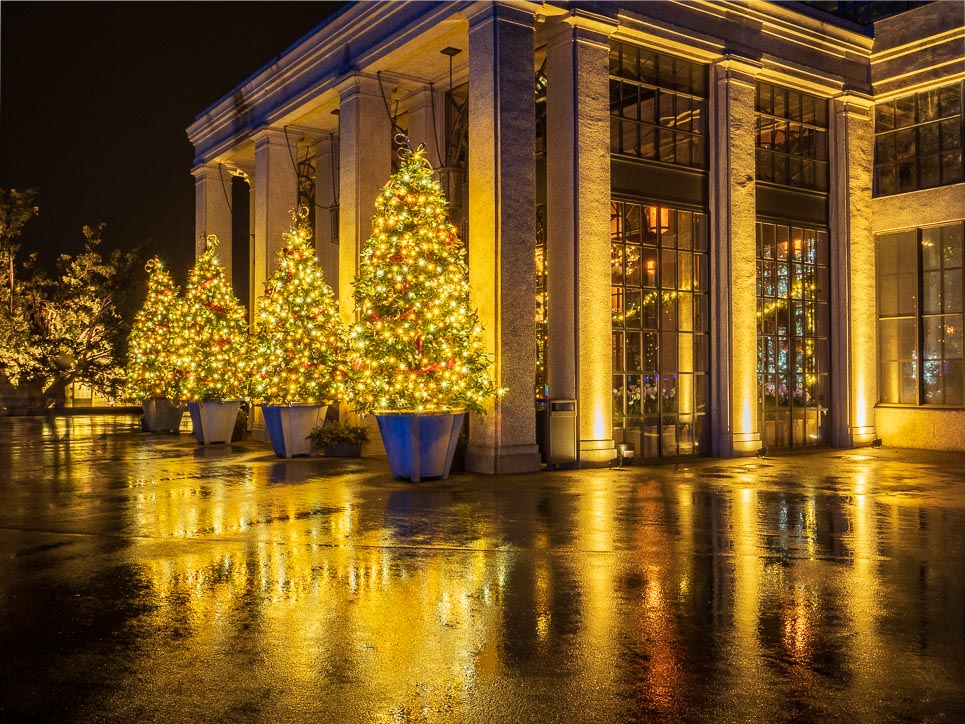
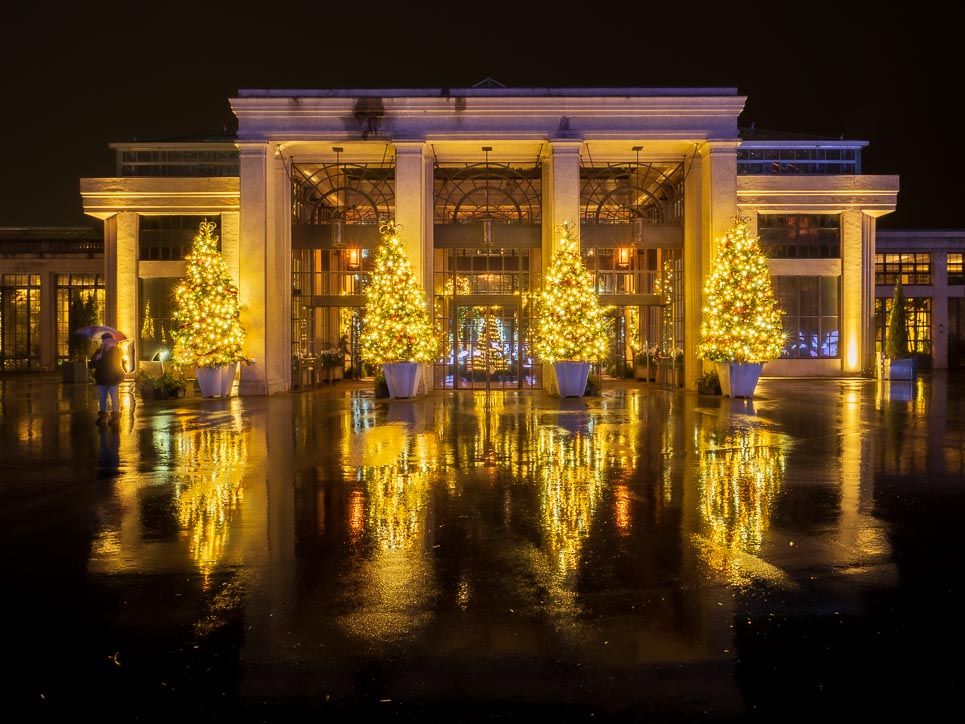
First, arrive early – way before dark early. The best images, in my opinion, are made during Blue Hour, or dusk-the time after the sun has set and the color is almost gone from the sky, but before total darkness. At this time of day, you get a beautiful deep blue sky as a backdrop for your images. This light balances nicely with the glow of lights making exposures less of a challenge. There is still detail in the scene, and unlit objects still have some detail. This is the easiest and most appealing time to photograph. In fact, I start shooting at sunset, as lights are just coming on. This often leads to images with gorgeous color in the sky behind the holiday lights-an added WOW factor.

Once the sky turns completely black, you lose detail in all darker areas of your scene, and your camera’s meter is no longer able to give you a reliable exposure. The meter will try to make all those darker areas closer to gray, and end up causing your scene or subject, in most cases, to be way overexposed. At this point you will need to switch to full Manual exposure, if you are not there already. I highly recommend using a tripod, as you will likely be shooting at longer exposures than you can safely hand-hold your camera without motion blur from camera shake. If using a tripod, you can stick to lower ISOs. Note: make sure you are NOT using Auto ISO! Set your ISO to 200 or possibly 400 if there is motion in the scene. If shooting handheld, then you will need to use a high enough ISO to keep your shutter speed at a hand-holdable range.
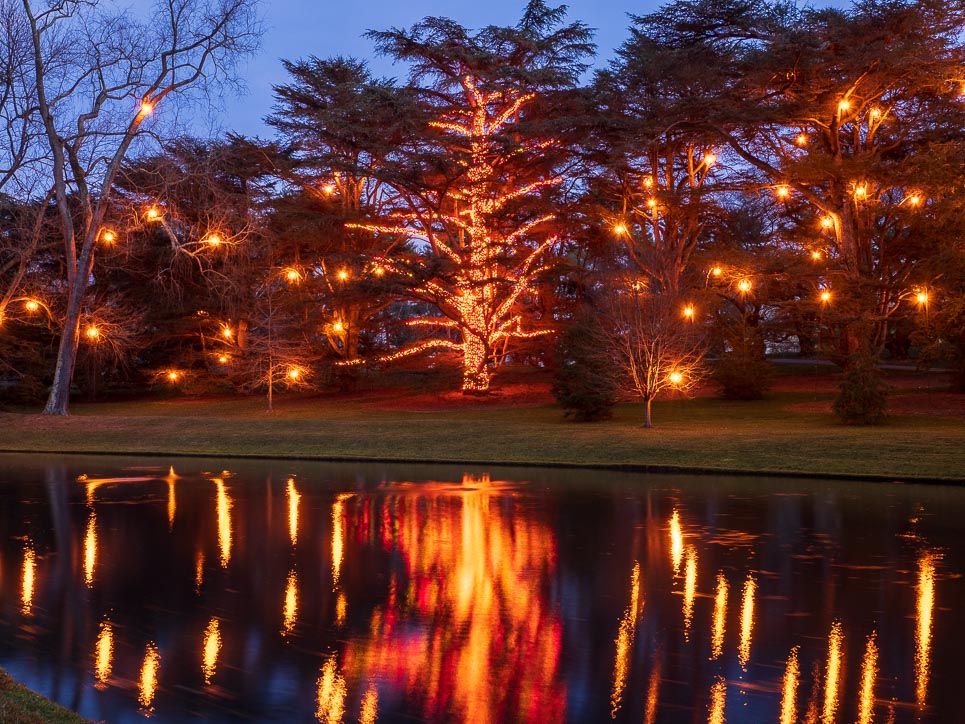
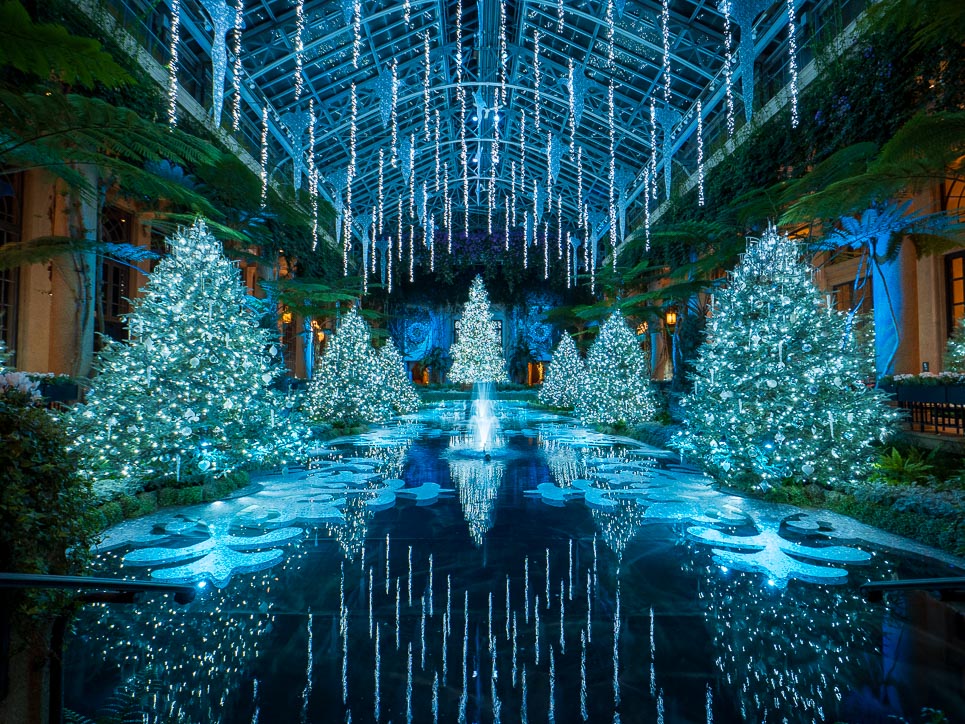
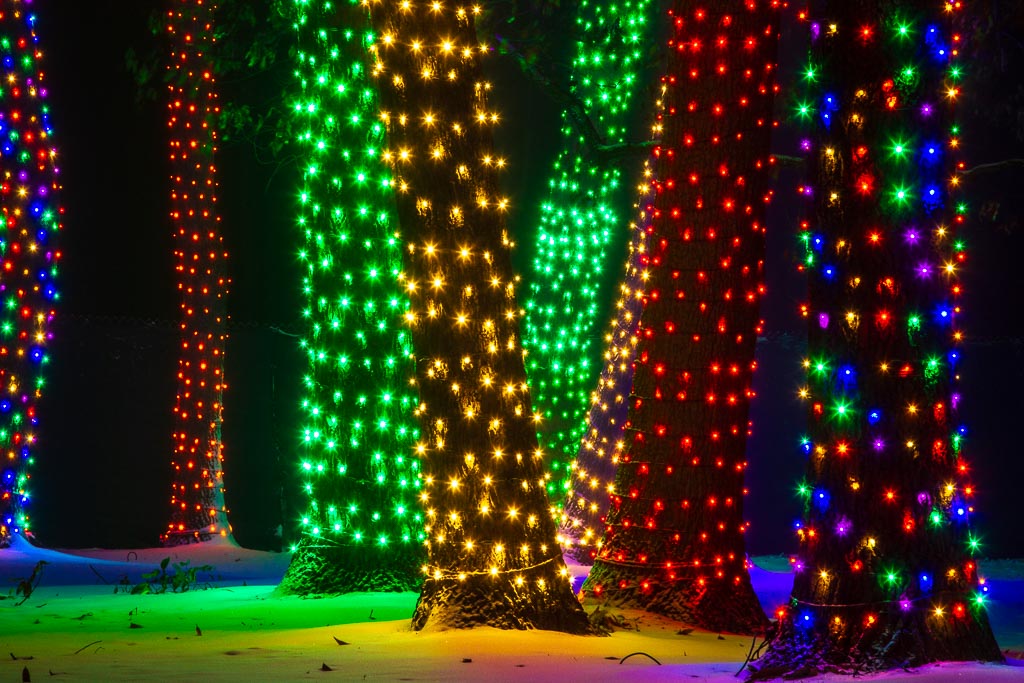
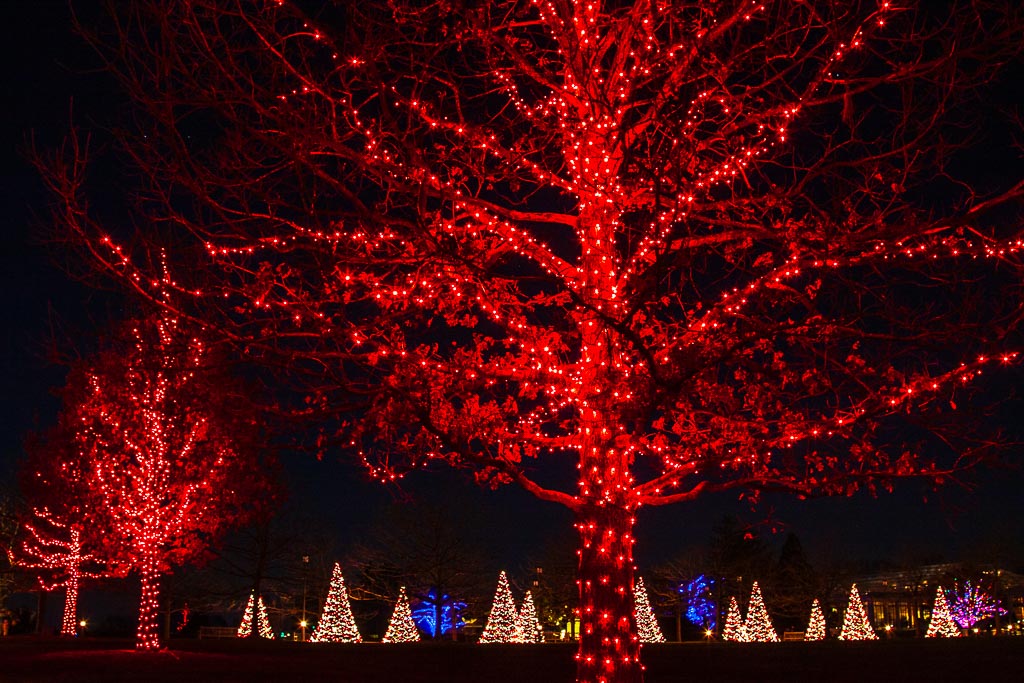
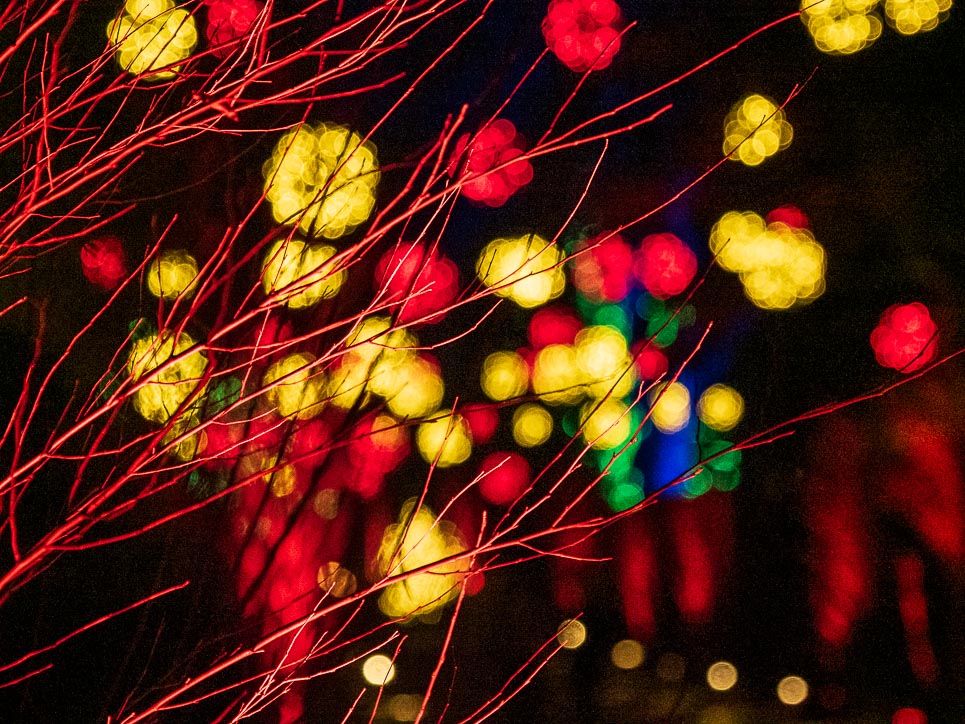
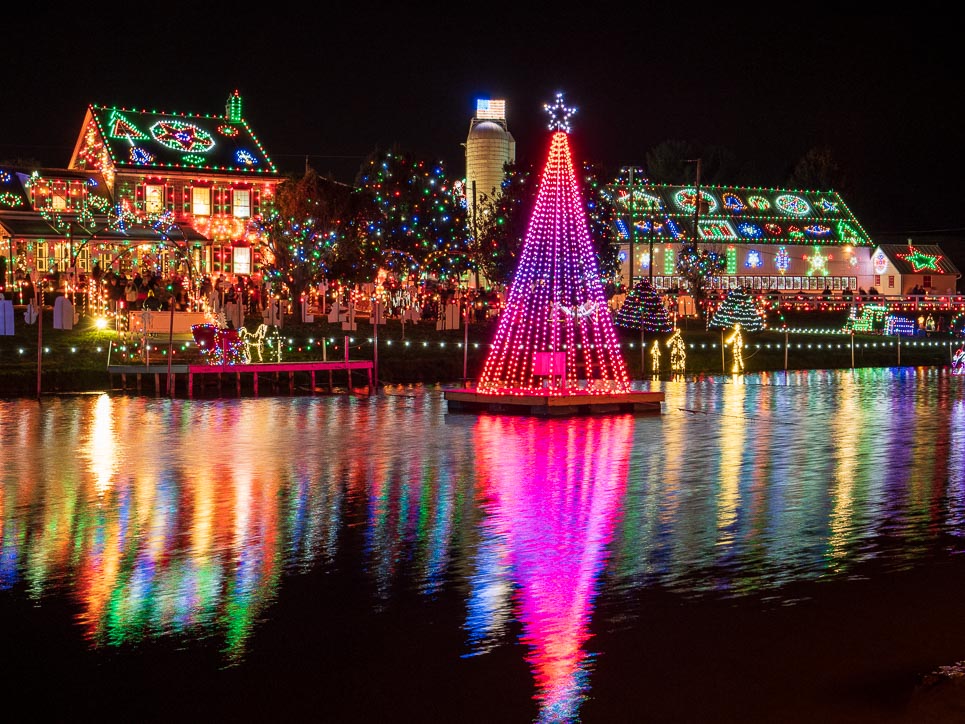
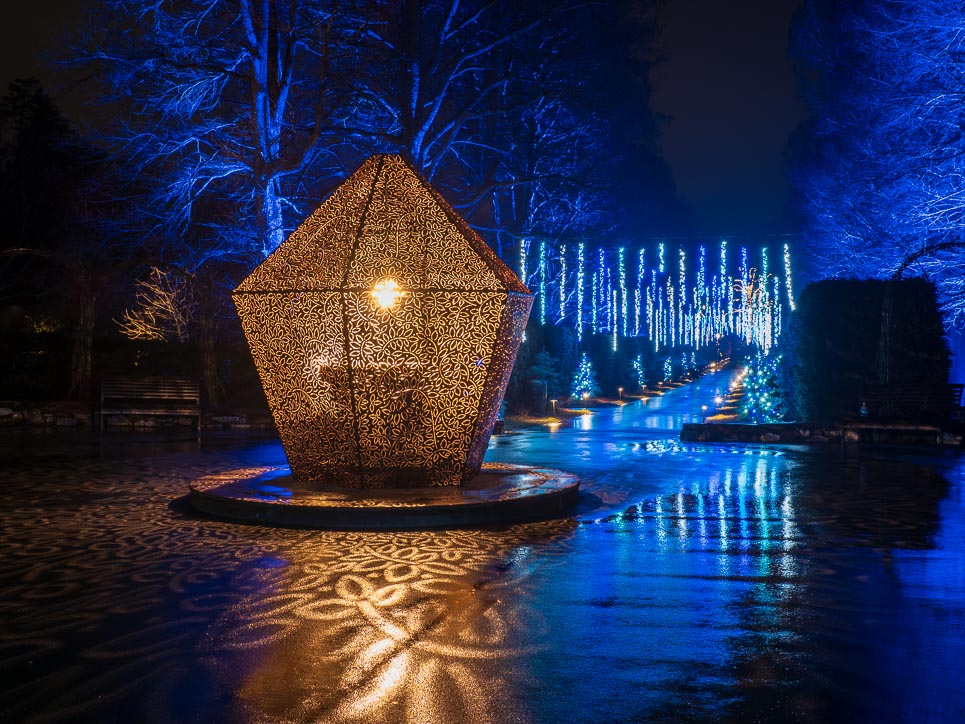
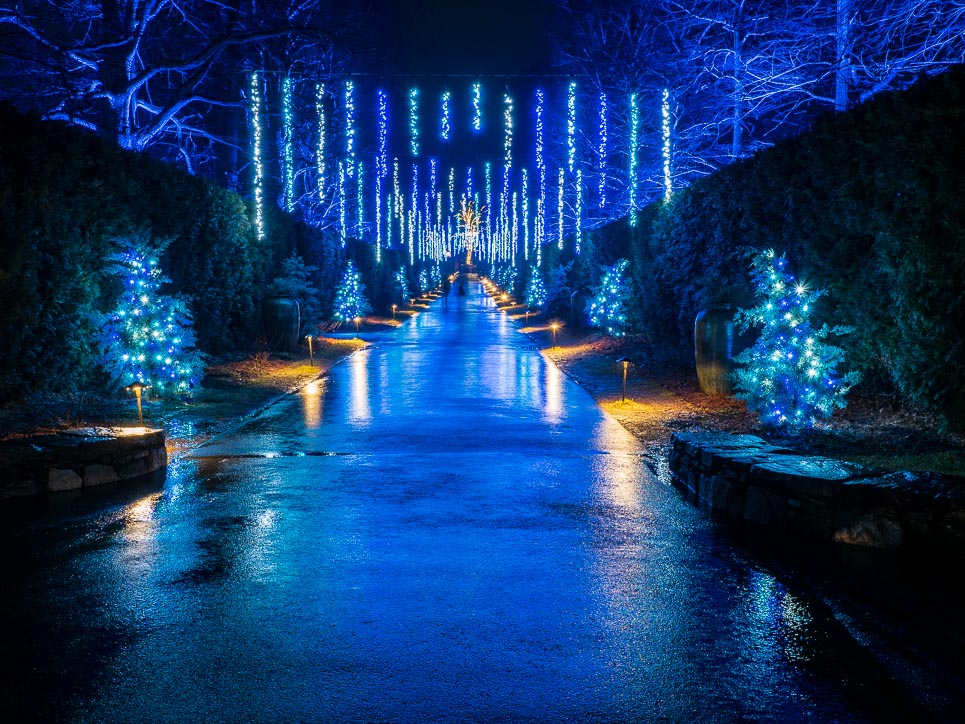
Next, focus on your composition. Fill the frame with lights. Avoid large areas of darkness. Look for reflections, which can add a magical glow to the scene.
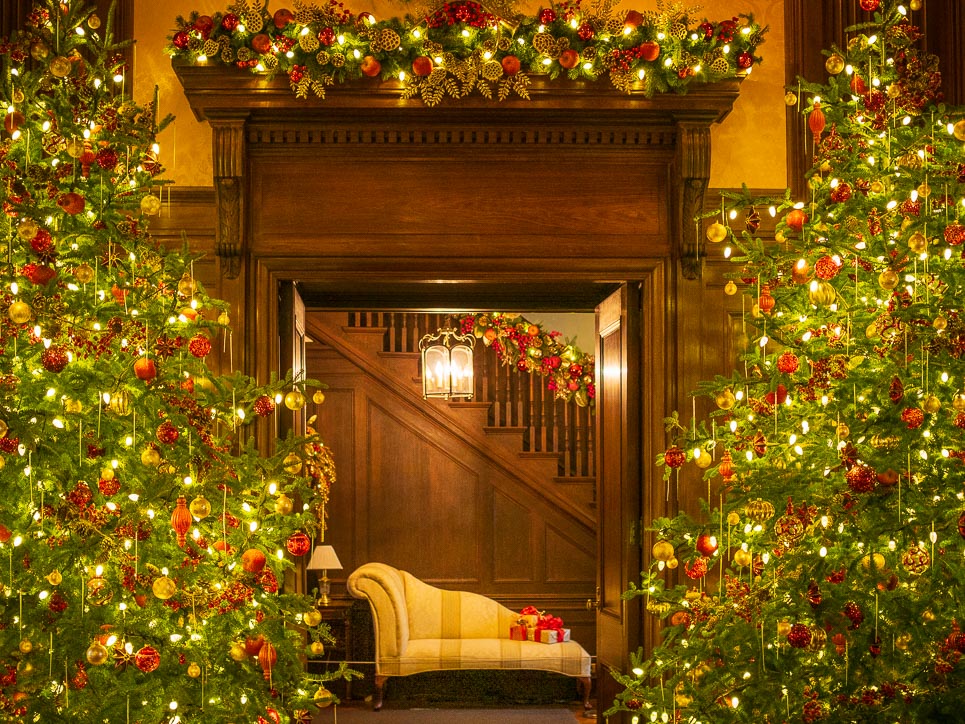
Consider using lights or decorations as frames to surround your subject or shoot through.
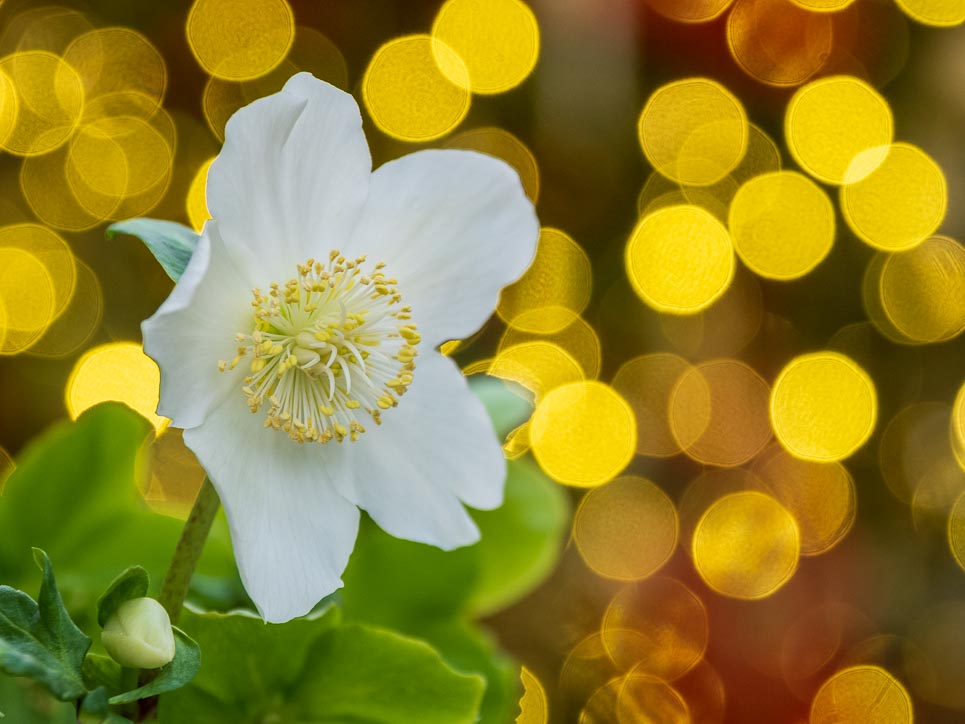
Next, choose your aperture thoughtfully. Aperture controls the depth of field/depth of focus in your image. Do you want everything in focus? Then use a smaller aperture. I personally love to use wider apertures to give a shallower depth of field to the images, creating a soft, more pleasing background. You get much more creative images shooting this way. In addition, the closer you are to your subject and further away the background lights, the more pronounced the bokeh effect will be. Also, the greater the focal length of the lens, the more pronounced the affect will be. My new favorite lens to use with holiday lights is the Olympus 40-150mm f/2.8 PRO lens. https://amzn.to/4p3ue4x
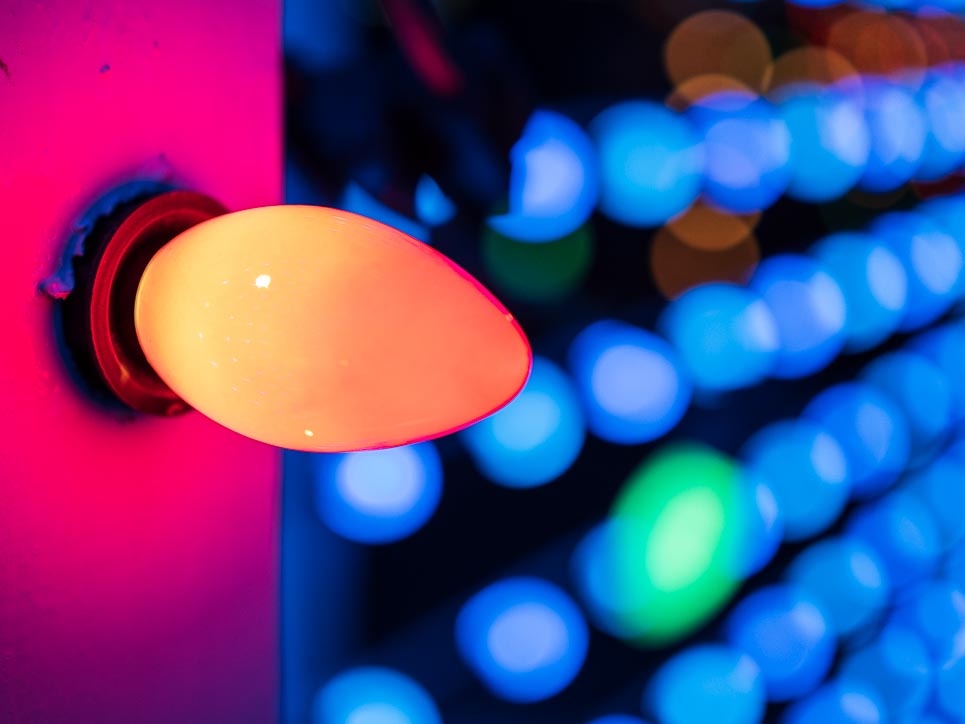
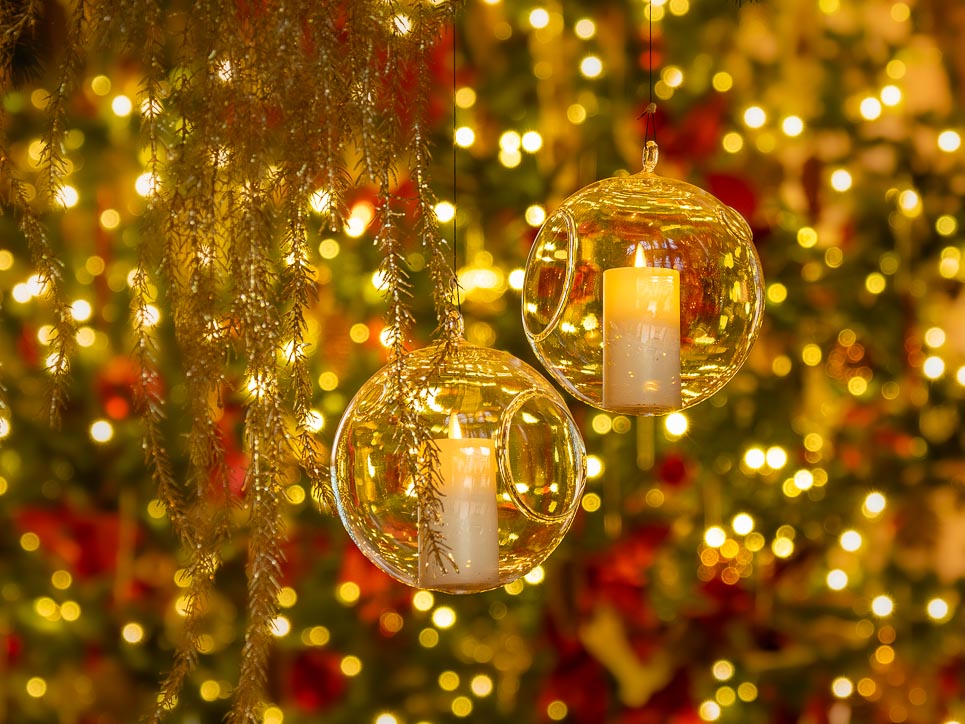
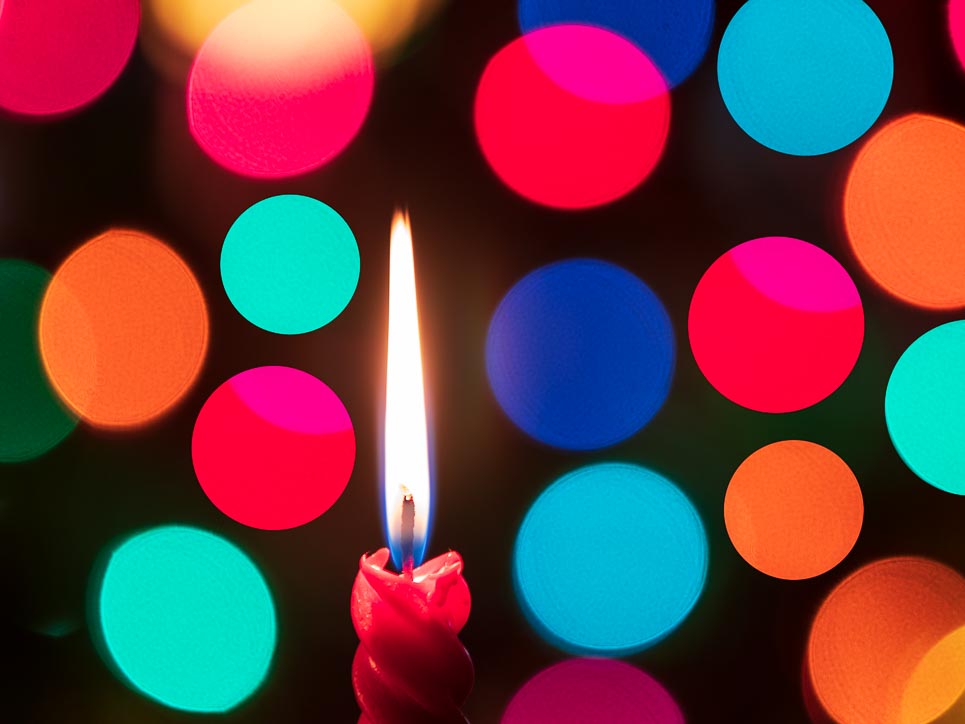
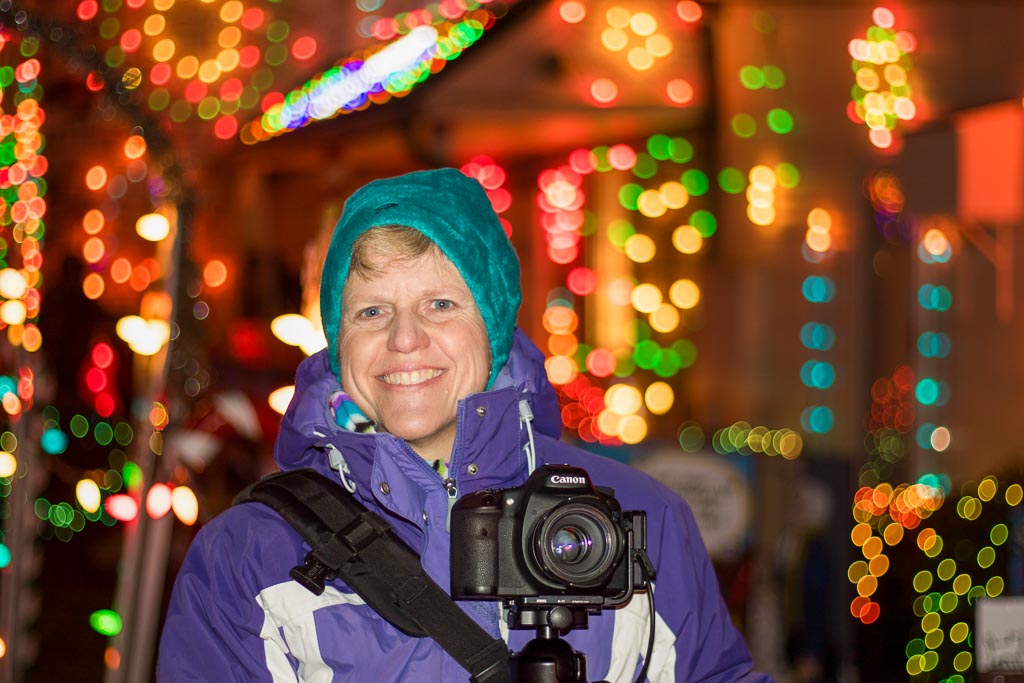
My absolute favorite way to convey holiday lights, is to create beautiful bokeh balls out of the lights in the background. Using a wide aperture and longer focal length, get as close to your subject as you possibly can. Then carefully move the position of the camera until you see a pleasing background with the lights.
You can use this technique to create fun portraits, as with this one below taken of me at Kozier’s Christmas Village during a photo trek I lead there a few years ago. Taken using a “Nifty 50”, 50mm lens at its widest aperture of f/1.8. (and using fill-flash to light up my frosty face:) (Note: the lens link is for a regular Canon DSLR. You would need the adapter to use on a mirrorless camera.) Most all manufacturers should offer a similar lens. I currently us the Olympus 25mm f/1.8 lens.
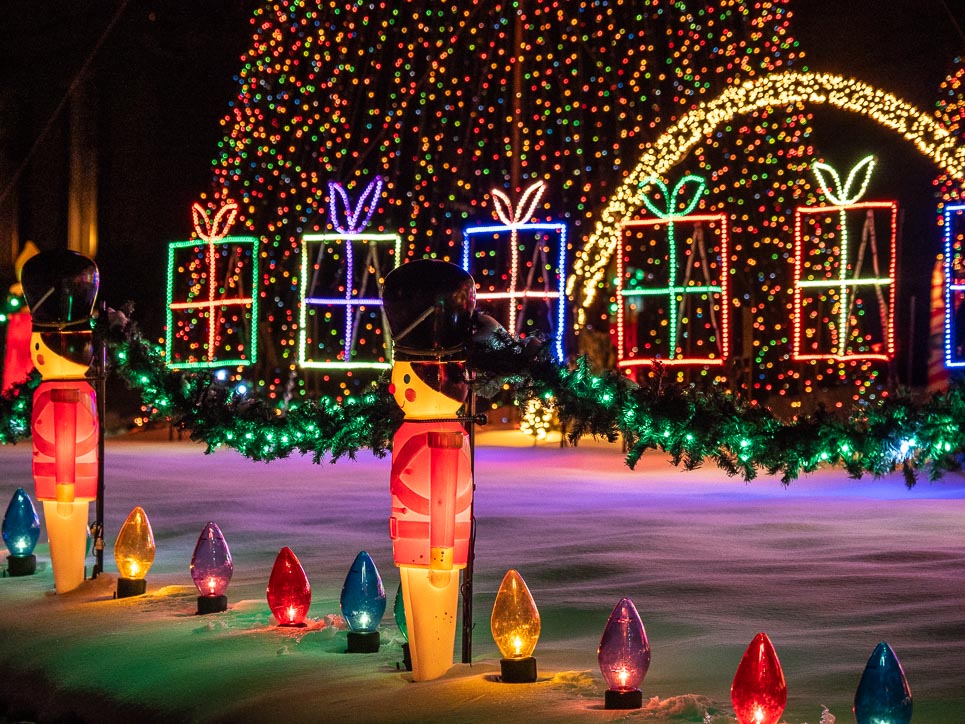
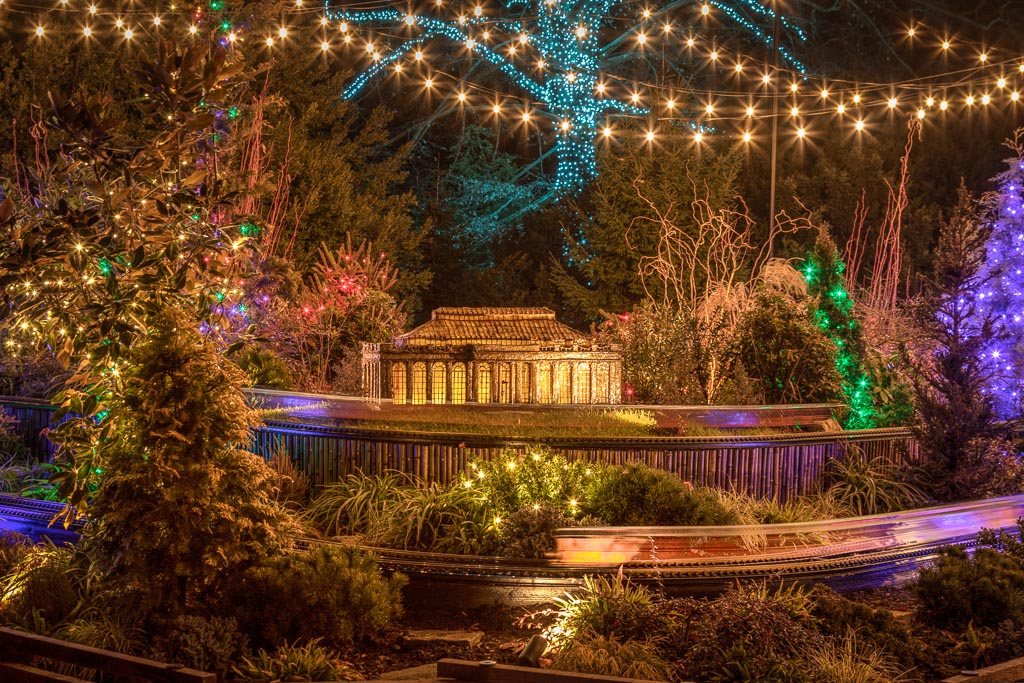
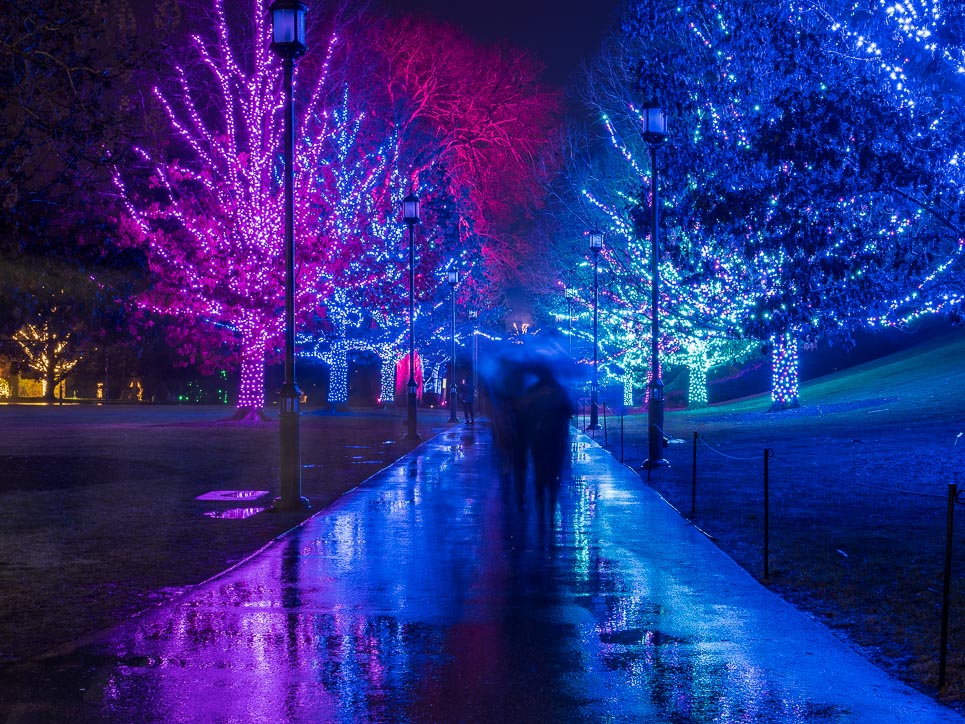
Another fun technique to play with if you have anything in the scene with motion-such as a train or spinning lights, is to use a slower shutter speed to convey motion. Slower shutter speeds will show more motion. You also need to be mindful of your shutter speed if it is windy. In this case, a faster shutter speed. For the last image below, the wind had really picked up, ruining my reflections. The wind also began causing the strands of light to become a blur as they blew in the wind. If it is windy outside, you would be best to choose another day to photograph, if possible-or use a fast shutter speed, likely coupled with a higher ISO.
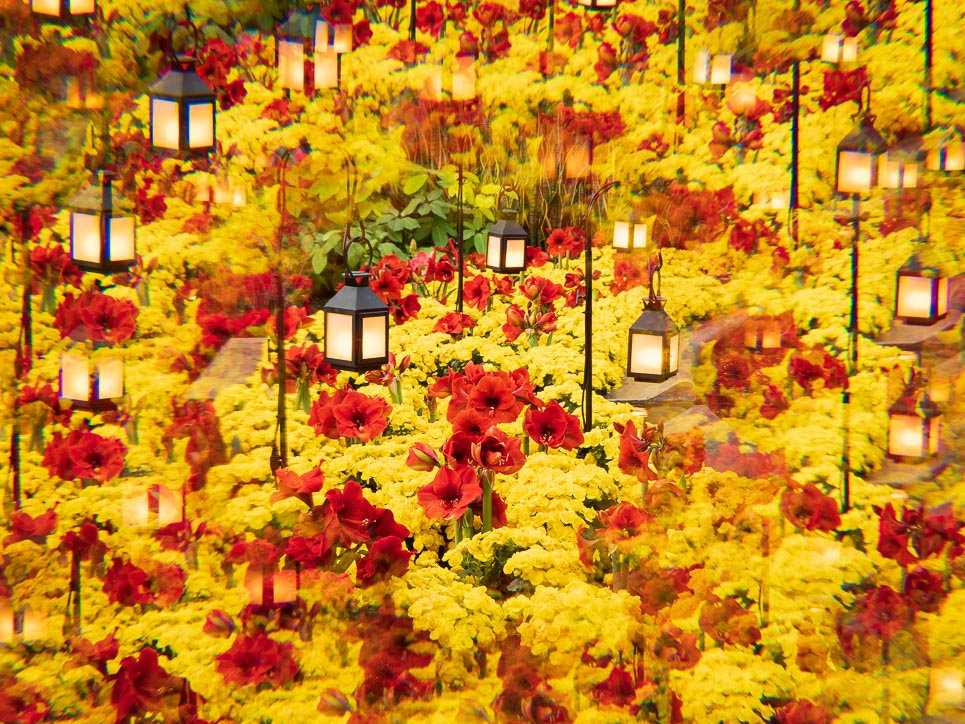
Last tip is to have a creative play. Try using creative filters, such as a cross screen or star filter. I also love to play with a kaleidoscope filter, as in the first image below. For this image I used a Kaleidoscope filter, such as this one. https://amzn.to/43NLbre
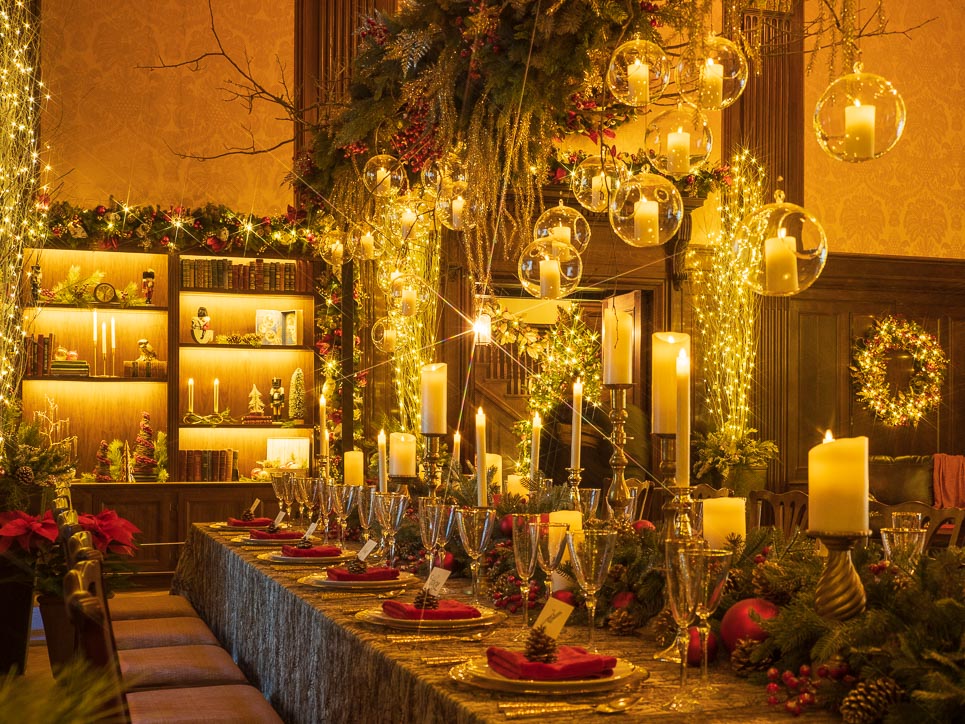
Star filters, AKA cross screen filters, come in 3 different varieties- 4, 6, or 8pt. I think my favorite is the 6 point, as used in the second image of the long table, but I own and carry all three to play with different affects. An option for a kit of all three can be found here. Or, I just became aware of a variable star filter-which I personally have just ordered. Check it out here https://amzn.to/3LUM1Mu
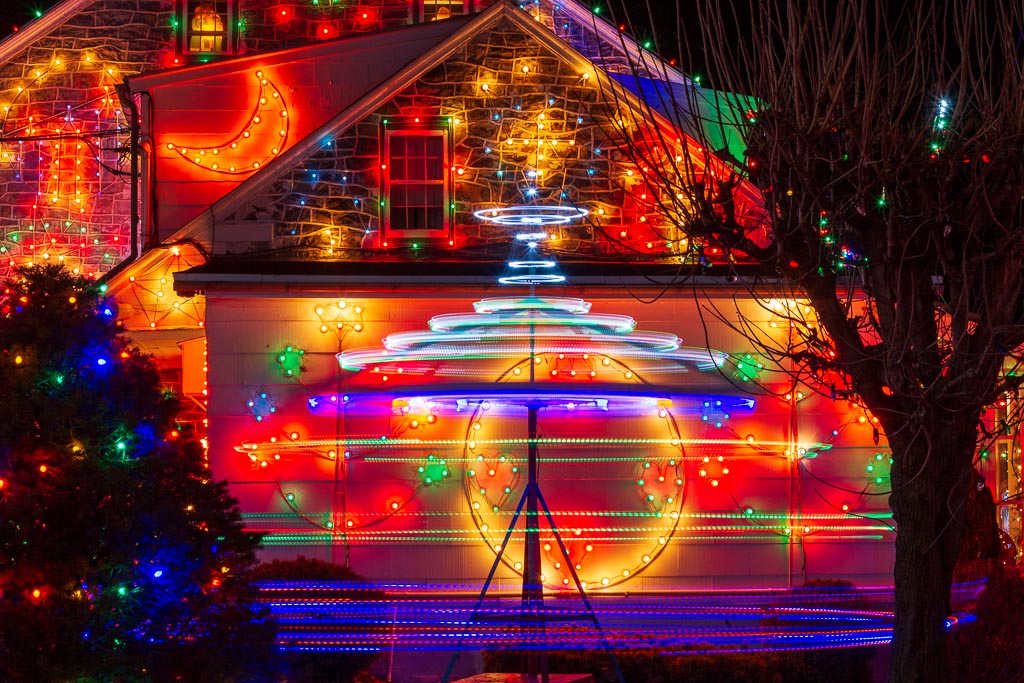
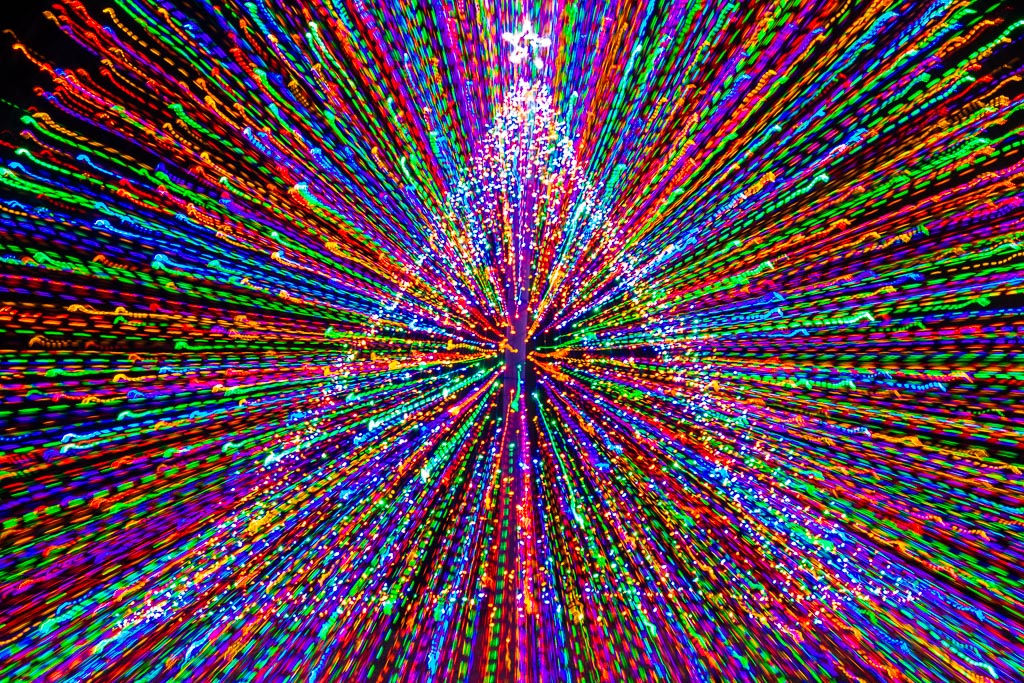
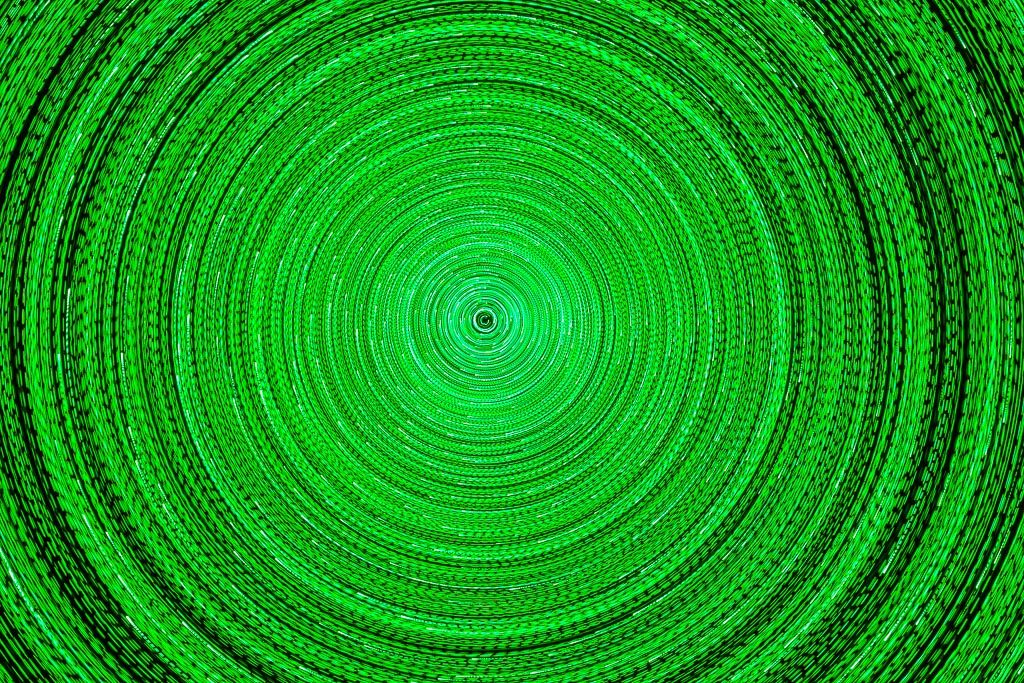
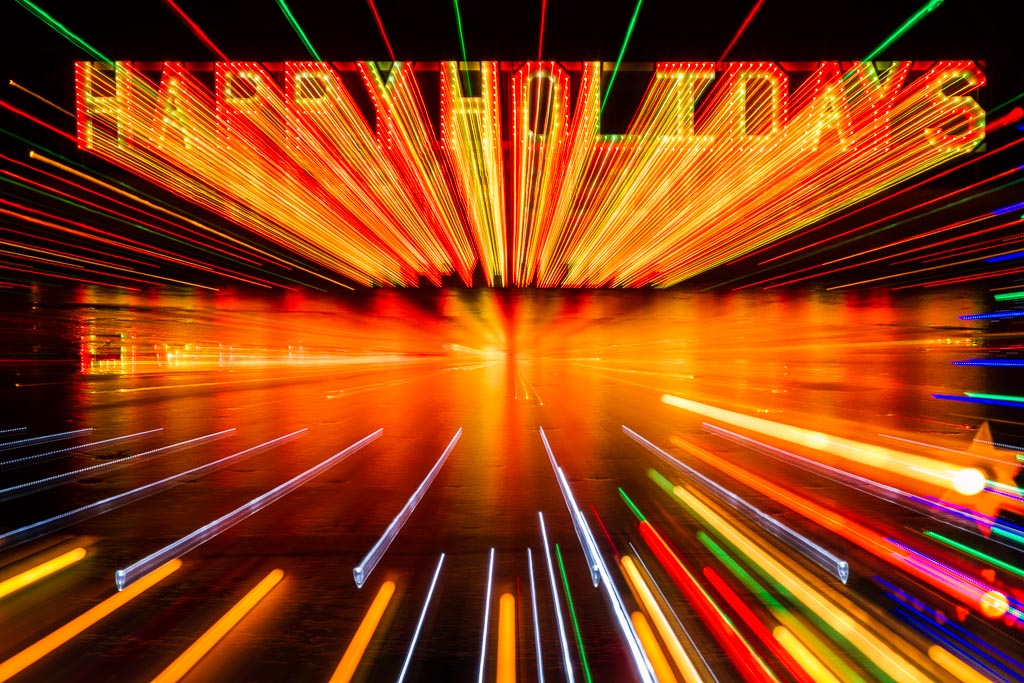
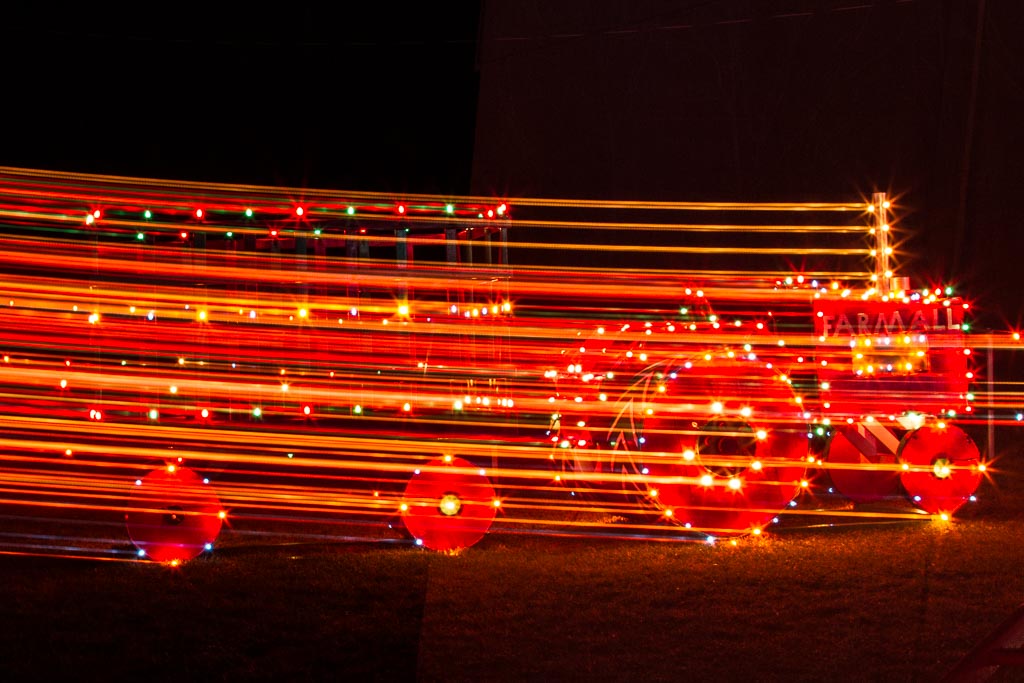
My favorite technique to creatively play with holiday lights is using ICM, or Intentional Camera Movement. Try zooming the lens in or out during the exposure. Swipe the camera from side to side. Swivel, squiggle or rotate it. For best results, you need to use a slower shutter speed, starting at maybe 1/4 of a second or a bit slower, otherwise the exposure will end before you complete your motion. The image below right is a Christmas tree made out of lights that was turning slowly. I used a longer exposure to record the motion a blur. During the exposure, I also played with zooming the lens in and out. It takes a bit of practice, but is tons of fun!

And lastly, don’t be afraid of the weather. Being out in the rain or snow can be less than desirable, but it’s a time when you can create some magical images. You obviously need to dress appropriately, and take good care of your camera gear. Know the degree to which your gear is weather-sealed. If you have an entry level camera-such as a Canon Rebel, it is likely not very weather sealed, so you should be extremely careful when out in the elements. I pay the extra money to buy higher end gear that I won’t have to worry about when I am out in rain, sleet or snow-as I often am. Use a rain cover, such as this one https://amzn.to/4ajtcwB. A plastic bag can also be used to shield your gear. (Don’t forget to cover your camera bag, as well! Use a lens hood to help keep water drops off the lens. Keep a towel handy to wipe your gear down if it gets wet. Drop a bunch of silica gel packets in your camera bag to help with moisture build up. And be careful when taking a freezing cold camera into a warm environment. The greater the difference in temps, the more likely you are to get condensation inside your camera. When that happens, it may take anywhere from 15 minutes to an hour to defog.
I hope you found these tips helpful, and gained some inspiration to get out and create a few magical images of your own. Feel free to tag me in your social media posts. I would love to see how you made out!
(Note: the links shared in this post are affiliate links. I will receive a small commission if you purchase using one of the links. I appreciate this simple and small way to support my business:)
Please consider following me on social media. I post regularly on Instagram: @ValerieHoffmanPhotography and Facebook: “Valerie A Hoffman Photography”. And if you would like to take your learning to the next level, consider joining me on one of my upcoming workshops. See the home page or events section here on my website for more info.
Coming up on December 9th, I will be leading a workshop to photograph the beautiful light displays outdoors at Longwood Gardens. There are still a few spots left to join us. If interested, see the event listing and register right away!
Have a blessed holiday everyone!